Key Takeaways
Thrift flip projects work best when you choose sound pieces, plan the finish and give yourself room to learn.
- Look for useful shapes, sturdy materials and manageable repairs.
- Start with no-sew changes or simple painting before attempting complex alterations.
- Clean, prepare and protect every item before adding colour or decoration.
- Use a clear design plan so the finished piece looks deliberate.
- Record your costs if you intend to sell the result.
Start with the right thrifted pieces
A successful flip usually begins before you buy anything. You are looking for an item with a good foundation, not necessarily something that already looks beautiful. A strong shape, useful size or appealing material can matter more than surface marks.
What makes an item worth flipping
Consider what the piece could become and whether you would genuinely use it afterwards. An oversized shirt, plain timber frame, solid basket or tired side table can all offer a practical starting point. The best finds often need one clear improvement rather than six unrelated changes.
Check the proportions, too. A chair with a comfortable shape may be worth saving even if the fabric is dated, while a decorative object with awkward scale can remain difficult to style after its makeover. Take a quick photograph in the shop if you are unsure, then revisit the idea before buying.
How to spot quality materials and construction
Run your hands over timber, fabric and metal before deciding. Look for even joins, firm seams, working hinges and surfaces that are worn rather than structurally broken. Natural fibres, solid wood and weighty hardware can often tolerate more cleaning and finishing than fragile substitutes.
For furniture, gently test the legs, drawers and back. A little wobble may be repairable, but cracks through load-bearing areas deserve caution. With clothing, hold the item up to light and inspect the underarms, hems and fastenings for thinning or hidden damage.
Choosing projects based on your skill level
Match the project to the tool and technique you already understand. If this is your first attempt, choose a clean-lined item that can be improved with washing, painting, trimming or a hardware change. You will learn more from a small, finished project than from an ambitious piece left half complete.
A useful progression is to begin with flat surfaces and simple shapes, then move towards upholstery, fitted garments and repairs that require accurate measuring. A manageable first project builds confidence without making every small mistake expensive.
Common thrift store finds to avoid
Some bargains are only bargains because they demand more time and money than expected. Avoid pieces with strong damp smells, extensive mould, active pests, severe water damage or materials that crumble when touched. Be equally cautious with clothing that has permanent odours, widespread fabric weakness or complicated stains.
Ask yourself whether replacement parts will be easy to find and whether the final item will be safe to use. If the answer is uncertain, leave it behind. There will be another chair, jacket or frame.
Gather supplies before you begin
Preparation keeps a creative project calm and prevents rushed decisions. You do not need a dedicated studio, but you do need a clean work surface, suitable tools and enough time for products to dry. Gather the basics before you start pulling an item apart.
Essential tools for clothing and fabric flips
A sharp pair of fabric scissors, measuring tape, pins, chalk and a seam ripper cover most simple clothing changes. Fabric glue or hem tape can help with no-sew work, while a needle and matching thread are useful for small hand repairs.
Keep an iron and pressing cloth nearby. Pressing hems and seams can make a simple alteration look much neater, even when the stitching is modest. Test adhesives and heat on an inconspicuous area first.
Paint, primer, and finishing products for furniture
Furniture projects commonly need cleaner, sandpaper, primer, paint and a protective topcoat. The right combination depends on the existing surface and the finish you want, so read the product label rather than assuming every paint works on every material.
Use separate brushes for cleaning and painting, and have lint-free cloths ready for wiping dust. Sanding between suitable coats can improve the result, but avoid removing more surface than necessary from an older veneer.
Low-cost materials for creative details
Small additions can change the character of a piece without making the project costly. Save useful scraps and collect details that suit several projects rather than buying a large quantity for one experiment.
Good options include:
- Offcuts of cotton, denim or upholstery fabric
- Pre-loved buttons, ribbons and trims
- Cardboard for templates and drawer liners
- Reused jars for brushes, screws and small tools
These materials are especially handy when you want to test a colour, repeat a motif or cover a minor flaw. Keep them sorted so the creative choice stays simple instead of becoming a search through a crowded box.
How to work safely and protect your space
Open windows when using strong cleaners, paints or finishes, and follow the directions on each product. Wear suitable eye protection and gloves when the label calls for them, and keep food, children and pets away from the work area.
Protect floors with a drop cloth and raise small furniture pieces on blocks or cardboard. Let every coat dry fully before moving the item; fingerprints and dust are much easier to prevent than repair.
Try easy thrift flip projects for beginners
The easiest thrift flip projects have a visible result and a forgiving process. Start with pieces you can alter gradually, checking the shape after each step. A small change can be enough to make an old find feel considered and useful again.
No-sew upgrades for shirts, sweaters, and denim
Try shortening a boxy shirt, adding a simple tie, or creating a raw hem on sturdy denim. Hem tape and fabric glue can work for selected fabrics, but the finished item still needs careful pressing and a discreet test first.
For a sweater, consider removing a dated embellishment or adding a fabric patch to cover a small mark. Avoid cutting stretchy or slippery materials until you are comfortable judging how the fabric will behave.
Turning old frames into useful home decor
A frame can become a noticeboard, jewellery organiser, tray or shallow display shelf with a little cleaning and a new backing. Remove loose hardware, sand rough edges and decide how the frame will be used before choosing paint or fabric.
The backing should suit the job. Cork, wire mesh, fabric or sturdy card each creates a different function, so keep the finished weight and mounting method in mind. A simple frame often looks best with one strong colour and restrained details.
Refreshing baskets, trays, and storage pieces
Clean woven baskets gently with a soft brush and a lightly damp cloth, allowing them to dry completely. A tray may need only fresh paint and new feet, while a storage box can gain character from a lined interior or a repaired handle.
Work with the original texture instead of covering everything. Leave some weave, timber grain or aged metal visible when it is sound, then repeat one finish elsewhere to make the update feel cohesive.
Creating simple accessories from overlooked finds
Old scarves, belts, denim pockets and unusual buttons can become bags, hair accessories, key fobs or decorative ties. Choose one material with enough strength for the job and reinforce any area that will receive regular pulling or weight.
Make a paper template before cutting valuable fabric. It gives you a chance to check scale and placement, and it turns an uncertain idea into a series of small, reversible decisions.
Transform thrifted clothing with style
Clothing flips reward patience because fit and comfort matter as much as appearance. Begin by washing or cleaning the garment according to its care label, then try it on before deciding where to cut. Keep the original seams and hems in mind because they may save time.
Updating the fit without advanced sewing
An oversized shirt can often be improved by shortening the hem, narrowing the sides or changing the sleeve length. Use pins or temporary chalk marks while wearing the garment, and measure both sides so the alteration remains balanced.
If you are using hand stitching, choose a simple running stitch for a temporary guide and a stronger stitch for areas under tension. Make small changes first; removing more fabric is easier than restoring it.
Adding patches, trims, and decorative details
Patches can hide a mark, strengthen a worn area or simply add personality. Place them where the garment naturally creases or where they will not interfere with pockets, fastenings and movement.
Repeat a colour or texture once elsewhere so the detail feels intentional. A single trim on a collar, cuff or pocket can be enough, while too many competing additions may make the garment look unfinished rather than expressive.
Combining pieces for a completely new garment
Combining two garments takes more planning than decorating one. Look for compatible fabric weights, similar care requirements and seams that can be joined without creating uncomfortable bulk. A shirt panel, denim pocket or contrasting sleeve can become a focused feature rather than a full redesign.
Lay the pieces together before cutting and photograph the arrangement. This gives you a reference when you move the fabric and helps you spot awkward lines before they become permanent.
Washing, repairing, and preparing clothes for flipping
Wash garments using the care instructions and check them again once dry. Repair loose buttons, small tears and weakened hems before adding decorative work, since a new detail cannot compensate for a garment that is uncomfortable or unreliable.
Press the finished piece, trim loose threads and inspect it in natural light. If you would not feel comfortable wearing it for a full day, return to the construction before worrying about photographs or styling.
Give furniture and home decor a fresh look
Furniture restoration is often less about dramatic transformation and more about revealing what is already useful. Clean first, repair second and decorate last. That order protects the surface and stops paint or fabric from hiding problems you still need to fix.
Cleaning and repairing secondhand furniture
Remove dust from joints, drawers and undersides before using a suitable cleaner. Test it in a hidden area, particularly on veneer, painted finishes and older timber. Tighten loose screws, repair minor joins and replace damaged feet where practical.
Do not rush to sand away every mark. Some wear adds character, while deep damage or unstable construction needs attention before appearance. Once the piece is sound and clean, you can make a more informed decision about its finish.
Choosing colors and finishes that look intentional
Choose colour in relation to the room, the item’s shape and the amount of detail already present. A simple side table can carry a stronger shade, while a heavily carved piece may benefit from a quieter finish that lets its form remain visible.
Test samples on a hidden section or spare piece. Check them in both daylight and evening light, then decide whether the surface should be matte, satin or more reflective. Consistency matters more than chasing a perfect trend.
Replacing hardware and upgrading small details
New knobs, pulls, hinges or feet can change how furniture feels to use. Measure existing holes before shopping, and keep the original hardware until the project is complete in case it can be cleaned or reused.
A drawer that sticks may need adjustment rather than replacement. Waxing a timber runner, tightening a fitting or realigning a door can make a greater practical difference than adding another decorative coat.
Mixing textures for a modern, finished result
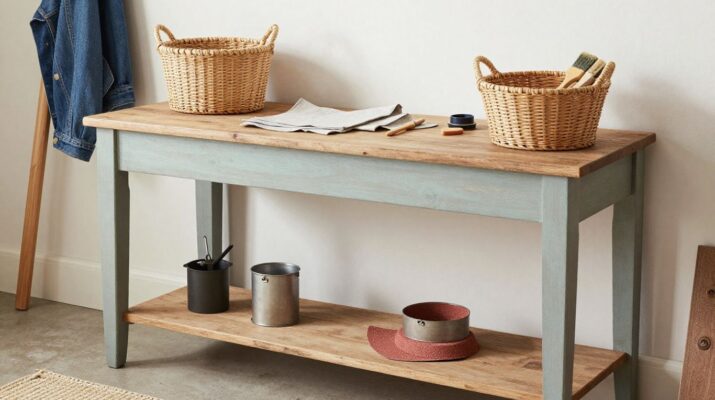
Texture gives a restrained makeover depth. Pair painted timber with woven baskets, smooth ceramic, natural fibre or a small amount of patterned fabric, keeping the number of competing surfaces under control.
For upholstered pieces, check that the fabric suits the way the item will be used. A beautiful delicate textile may be better reserved for a cushion or accent panel, while a frequently used seat needs a more durable choice.
Make your thrift flip projects look professional
A polished result comes from decisions made before the first cut or coat of paint. Think about use, proportion, colour and maintenance together. When each change supports the same idea, even a modest makeover feels deliberate.
Planning the design before making changes
Write down the intended use, the main finish and the one feature you want to keep. Take measurements and make a rough sketch, especially when you are changing a garment’s silhouette or adding storage to furniture.
Collect reference images for mood rather than copying every detail. A plan does not need to be elaborate; it simply gives you something to compare against when an exciting but unsuitable idea appears halfway through the project.
Avoiding common beginner mistakes
Many disappointing finishes come from skipping preparation, using too much product or changing direction repeatedly. Work in thin coats, allow drying time and check the item from several angles before deciding it needs another layer.
Other common problems include uneven hems, unsealed raw edges, mismatched hardware and decorations that do not suit the scale of the item. Pause between stages and correct small issues while they are still easy to reach.
Photographing before-and-after transformations
Photograph the original item before cleaning or dismantling it. Use the same background and a similar angle for the finished image, with soft natural light showing the colour and texture accurately.
Include a close-up of useful details such as a repaired seam, drawer pull or fabric texture. Clear photographs help you remember the process and make the transformation easier for someone else to understand.
Calculating material costs and setting a fair price
Write down the purchase price, consumables, replacement parts and any specialist services. Even when you already own the tools, noting the materials prevents you from underestimating what the project actually required.
A fair selling price should reflect the item’s condition, workmanship, usefulness and local demand rather than only the time you enjoyed spending on it. If the number feels too high, revisit the design and costs instead of hiding defects or overstating the work.
Conclusion
The most rewarding thrift flip projects are not necessarily the biggest ones. Choose a sound item, make a clear plan, prepare the surface and let each change earn its place. With practice, you will get better at seeing potential in worn furniture, overlooked clothing and ordinary objects without losing the character that made you choose them.
Frequently Asked Questions
What is a thrift flip?
A thrift flip is a project that changes a secondhand item into something more useful, attractive or personal through cleaning, repairing, altering, decorating or repurposing.
What is the easiest thrift flip for a beginner?
Simple options include repainting a small frame, refreshing a basket, shortening a sturdy shirt or replacing the hardware on a small piece of furniture.
Do you need a sewing machine for clothing flips?
No. Some clothing changes can be completed with careful cutting, fabric glue, hem tape or hand stitching, although a machine can make certain structural alterations faster.
How do you know whether furniture is worth buying?
Check its stability, material, construction, smell and repair needs. A sound frame with an unattractive finish is usually a better starting point than a damaged item that needs major rebuilding.
Should you clean or paint a thrifted item first?
Clean it first and let it dry completely. Cleaning reveals the real condition of the surface and helps paint, glue or other finishes adhere more reliably.
How can you make a flip look less homemade?
Plan the design, work slowly, keep edges neat and avoid adding details without a clear purpose. Consistent colour, balanced proportions and a clean finish usually matter more than complexity.
Can you sell thrift flip projects?
You can choose to sell finished pieces, but record your purchase and material costs first. Describe the item honestly, show its condition clearly and set a price that reflects the work involved.