Key Takeaways
Thrift flip projects work best when you choose a sound piece, plan the change, and keep the finish practical. Start small, learn from each save, and let the original character guide the result.
- Choose sturdy items with a clear use and manageable repairs.
- Sketch your changes and price materials before you begin.
- Use simple clothing, furniture, and décor techniques suited to your tools.
- Prepare, clean, and protect every surface before refinishing.
- Photograph the process honestly and price the finished piece fairly.
Choose the right pieces for thrift flip projects
A successful flip usually begins before you pick up a paintbrush. Look for an item with good bones, a useful shape, or a material worth saving, then decide whether the work suits your time and ability. The best thrift flip projects do not need to become completely different objects; a thoughtful refresh can be enough.
What makes an item worth flipping
Start with potential rather than decoration. An oversized shirt with a good fabric, a solid timber stool with a tired finish, or a plain frame with pleasing proportions can all become worthwhile projects. Ask whether one or two changes will make the item more useful, attractive, or suited to your home.
Pay attention to shape and function. A beautiful idea cannot rescue an object that is uncomfortable, unstable, or awkwardly sized for its intended use. If you can explain the finished result in one clear sentence, the project is usually easier to control.
How to spot quality materials and construction
Inspect seams, joins, edges, hardware, and the underside of each find. On clothing, hold the fabric up to the light and check whether the weave feels even; on furniture, gently test joints and look for solid timber, veneer, or particleboard before deciding how to treat it.
Quality does not always mean expensive. It means the item can withstand the handling involved in cleaning, cutting, sanding, painting, or wearing. Original details such as dovetail joins, metal fittings, unusual handles, or a well-made lining can also give a simple piece more character.
When stains, damage, or missing parts are deal breakers
Some flaws are cosmetic, while others point to a bigger problem. Surface marks, faded colour, and dated hardware are often manageable, but swollen boards, active mould, strong odours, brittle fabric, structural cracks, and missing load-bearing parts deserve much more caution.
Do not buy a project on the hope that every problem will disappear. Check whether replacement parts are available and whether the damaged area can be reached without dismantling the whole object. If the repair would compromise safety or function, leave the find behind.
Setting a budget before you buy
A low purchase price can be misleading if the project needs specialist tools, replacement hardware, new fabric, or several coats of finish. Before buying, set a total amount you are comfortable spending and include a small allowance for supplies you may have overlooked.
A quick comparison can keep the decision grounded. Use the likely finished value as a guide, not a promise, and remember to count your time if you plan to sell the item.
| Project type | Likely extra needs | Main question to ask |
|---|---|---|
| Clothing refresh | Fabric scissors, adhesive, trim | Will the garment still fit and wash well? |
| Small wood piece | Cleaner, sandpaper, paint or stain | Is the structure sound enough to keep? |
| Frame or mirror | Cleaner, primer, suitable finish | Can the surface be prepared without damage? |
| Decorative conversion | Hardware, backing, or lining | Will the new use be stable and practical? |
The table is useful because it separates the cost of the object from the cost of making it usable. If the materials begin to outweigh the result, simplify the design or save your budget for a stronger find.
Plan your design before starting
A little planning prevents a great deal of rework. Before cutting or sanding, decide what you want to preserve, what needs changing, and how the finished piece should feel in its setting. A plan can be loose and hand-drawn; it simply needs to make your next steps visible.
Finding inspiration without copying the original piece
Collect references for individual details rather than searching for one perfect finished object. You might borrow the proportions of one piece, the colour pairing of another, and the hardware idea from a third, then adapt them to the item in front of you.
Photograph your find from several angles before altering it. The original shape may reveal a useful feature you would otherwise cover, such as a curved edge, an interesting pocket, or a handsome timber grain.
Choosing colors, fabrics, and finishes that work together
Limit your palette to a few related colours and test them together in daylight. A warm timber tone may sit comfortably with cream and rust, while a cool painted surface may work better with grey, blue, or muted green accents.
Texture matters as much as colour. Pairing a smooth painted surface with woven fabric, brushed metal, or a slightly weathered edge can make a small project feel considered rather than overly decorated.
Measuring and sketching your changes
Measure twice before removing material, particularly when shortening a hem, adding a shelf, or replacing upholstery. Record width, height, depth, seam allowance, and the position of existing holes or fittings in a notebook.
A simple front and side sketch is often enough. Mark the parts that will stay, the parts that will be removed, and any areas that need reinforcement. This makes it easier to spot a proportion problem while the fix is still easy.
Estimating time, tools, and material costs
Break the project into preparation, making, drying, curing, and final styling. Drying and curing can take longer than the hands-on work, so do not plan to use or sell a freshly finished piece before the coating is ready.
Write down each supply before shopping. Reusing tools you already own and choosing a design that needs fewer materials will usually create a better result than adding detail simply because it is available.
Refresh thrifted clothing with simple techniques
Clothing is a friendly place to begin because many changes are reversible or require only a small amount of material. Choose stable fabrics and simple shapes while you build confidence. Wash and test the garment first so you are not investing effort in a piece that shrinks, bleeds, or falls apart.
Turning oversized shirts into updated tops
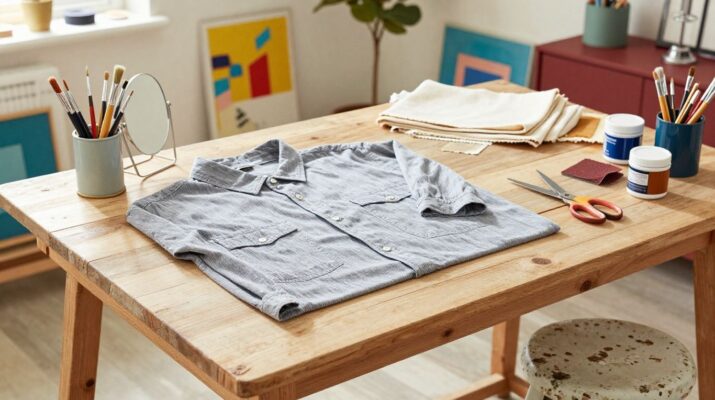
An oversized shirt can become a shorter top, a tied style, or a more fitted shape with careful marking. Try the garment on over a fitted layer, use pins to indicate the new silhouette, and leave extra fabric until you have checked movement and comfort.
For a first alteration, change one feature rather than reshaping everything at once. A shortened hem, adjusted sleeve, or added side tie can make the shirt feel current while keeping the collar, button placket, and original finish intact.
Adding patches, trim, or fabric panels
Patches and trim are useful when a garment needs personality or a small area needs covering. Place the detail where it supports the garment’s shape, such as along a pocket, at a cuff, or across a plain upper panel.
Test the attachment method on a scrap first. Heavy embellishment can pull a lightweight shirt out of shape, while a fabric panel needs edges that will not fray or irritate the wearer.
Creating no-sew clothing transformations
No-sew changes can include cropping, tying, folding, knotting, or using a suitable fabric adhesive for a light decorative detail. These methods are best for low-stress areas and garments that will not be subjected to repeated pulling at the join.
Keep the transformation modest and check the reverse side. A neat inside finish makes the piece look intentional, while excess adhesive, rough cuts, or a bulky knot can make it uncomfortable.
Cleaning and preparing garments before styling
Wash garments according to their care labels and allow them to dry fully before cutting or attaching anything. Remove lint, loose threads, and temporary stains, then press the fabric so measurements are taken from its true shape.
If you are unsure how a fabric will respond, test a hidden section with the cleaner or adhesive. Preparation protects your work and gives you a clearer view of the colour, drape, and condition you are actually working with.
Transform furniture and home décor finds
Furniture and décor offer plenty of scope for a visible before-and-after, but preparation remains the quiet centre of the job. Look at how the object will be touched, moved, cleaned, or displayed once finished. A lovely surface is not enough if the chair wobbles or the shelf cannot carry its intended load.
Updating wood pieces with paint or stain
Clean wood thoroughly before deciding whether to paint, stain, or leave parts exposed. Paint can unify mismatched repairs, while stain tends to suit surfaces with an attractive grain and an even enough colour to show through.
Apply thin, even coats and allow the recommended drying time between them. Light sanding between compatible coats can help create a smoother finish, but avoid removing more material than necessary from veneer or delicate edges.
Giving old frames and mirrors a new look
Frames are excellent small projects because their proportions are already established. Clean them carefully, protect the mirror, and test your finish on the back or an inconspicuous corner before committing to the front.
A new colour, a softly aged edge, or refreshed hardware may be all the frame needs. Keep the treatment in proportion to the artwork or mirror so the border supports rather than competes with what it holds.
Converting unexpected items into useful décor
An object can become more valuable to you when its new purpose is obvious and safe. A shallow tray might organise a tabletop, an old drawer could become a wall shelf, and a sturdy container may hold tools or plants if it can tolerate moisture.
Think through attachment, weight, and access before making the conversion. The most charming repurpose still needs to work during ordinary daily use, not only when it is photographed.
Repairing and preparing surfaces for refinishing
Fill small holes, tighten loose hardware, and repair weak joins before applying a decorative finish. Remove grease and dust, then dull glossy surfaces enough for the next coating to grip according to the product instructions.
Protect nearby areas and work in manageable stages. If a surface is unstable or an old coating is flaking badly, pause and decide whether more extensive restoration is appropriate before continuing.
Use beginner-friendly tools and materials
You do not need a workshop full of equipment to begin. A small, dependable kit is easier to store, maintain, and understand, and it encourages you to choose projects that match your actual skills. Buy supplies for the next project rather than collecting every possible product.
Essential supplies for painting and upcycling
Start with basic preparation and measuring tools, then add materials as your projects become more ambitious. Clean brushes, sharp scissors, sandpaper in a few grades, a measuring tape, a pencil, masking tape, drop cloths, and suitable cleaners cover many beginner jobs.
Keep paint, stain, primer, and sealant matched to the surface and intended use. Read the label each time, particularly for drying times, ventilation, cleanup, and whether the product suits fabric, timber, metal, or plastic.
When to use fabric glue, hand stitching, or sewing
Fabric glue can suit light decorative work and quick, low-stress joins when the label says it is appropriate for the material. Hand stitching gives you more control over small repairs, hems, and patches, while machine sewing is useful for repeated seams or stronger construction.
Choose the simplest method that will survive ordinary use. Consider the fabric’s weight, stretch, washing instructions, and the amount of pulling the join will receive before deciding.
For a first project, a short list keeps the work focused and reduces unnecessary shopping:
- A clean, stable item with one clear design goal.
- A measuring tool and a way to mark temporary lines.
- One suitable preparation product and one suitable finish.
- Protective equipment and a clean, well-lit work area.
These basics are enough for many small clothing, furniture, and décor updates. As you gain experience, you can add specialist tools because a particular project calls for them, not because a tutorial happened to use them.
Choosing safe finishes, adhesives, and sealants
Read the product label for surface compatibility, ventilation requirements, drying time, and cleanup. A finish that works on a decorative frame may not be suitable for a frequently handled surface, a food-contact item, or washable clothing.
Do not mix products casually or apply a new coating over an unknown finish without testing. When in doubt, use a hidden test area and let it dry fully before judging the result.
Protecting your workspace and working safely
Cover floors and benches, secure the item before cutting or sanding, and keep sharp tools stored safely when you pause. Good lighting helps you see uneven coverage, loose fibres, splinters, and small defects before they become larger problems.
Use ventilation and the protective equipment recommended on the label. Keep food, drinks, children, and pets away from the work area, and dispose of dusty or solvent-soaked materials according to local requirements.
Avoid common thrift-flipping mistakes
Most disappointing flips do not fail because the maker lacked creativity. They fail because the starting piece was unsuitable, the preparation was rushed, or the new design ignored how the item needed to function. A slower decision at the beginning can save hours later.
Buying projects that are too ambitious
A complicated makeover often hides several separate skills: structural repair, upholstery, electrical work, pattern drafting, or specialist finishing. If you are still learning, choose a project where the main challenge is familiar and the new skill is limited.
You can always make a larger project later. Finishing a small save neatly will teach you more than abandoning an ambitious one halfway through.
Applying paint or finishes without proper preparation
Paint rarely conceals dirt, wax, grease, loose fibres, or unstable old coatings for long. Skipping cleaning and surface preparation can lead to peeling, uneven colour, visible bumps, or a finish that feels rough.
Follow a repeatable order: inspect, clean, repair, prepare, test, apply, and allow enough drying or curing time. The order may feel slow, but it makes the decorative stage much more predictable.
Spending more on supplies than the item is worth
A project can become expensive through small purchases that are used only once. Before buying, check whether you can adapt the design, reuse leftover materials, or choose a simpler finish without losing the point of the flip.
If you plan to sell, write down the item cost, consumables, replacement parts, and time. The calculation may show that the project is best treated as a personal piece rather than a profitable listing.
Making changes that reduce durability or function
Do not remove support, cover a hinge, block a drawer, or weaken a seam simply to achieve a particular look. Test doors, handles, hems, shelves, and joins after the work is complete and before styling the item.
A durable finish may be less dramatic than a delicate one, but it will serve you better. Preserve the features that make the object useful, and decorate around them.
Style, photograph, and sell your finished flips
The final stage is more than making a nice picture. Styling shows how an object fits into ordinary life, while clear photographs and an honest description help another person decide whether it suits them. Even if you keep the piece, documenting the process gives you a useful record of what worked.
Creating before-and-after photos
Take the before photograph in similar light and from a similar angle to the final image. Clear the background without hiding flaws, and include close-ups of texture, hardware, stitching, grain, or any feature that explains the work.
Use natural light where possible and keep the camera steady. A small set of consistent images tells a stronger story than a single heavily edited photograph.
Writing a compelling listing or project description
Describe what the item is, what you changed, its dimensions, its materials, and any limitations or marks that remain. Avoid vague claims and explain care requirements plainly, particularly for painted, upholstered, or handmade pieces.
A useful description answers the questions you would ask before buying. Mention whether the item is ready to use, how it should be cleaned, and whether fittings or accessories shown in the photograph are included.
Pricing handmade and upcycled pieces
Begin with the total cost of the item and materials, then consider your time, the condition of the finished work, and the local market for similar pieces. There is no single correct formula, so use your calculation as a starting point rather than treating it as a guarantee of a sale.
Price honestly and leave room for reasonable selling costs where relevant. A clear explanation of the work can help a buyer understand the value without overstating what the piece is worth.
Sharing thrift flip projects on social media
Share the process as well as the reveal. A short sequence of the original find, preparation, key decisions, and finished detail gives viewers a reason to follow the project rather than seeing only a final object without context.
Use accurate descriptions and show the scale of the item. Invite practical conversation about techniques, but do not feel pressured to copy every trend; your own record of the save can be more useful than a perfectly staged post.
Conclusion
The most satisfying thrift flip projects begin with a sensible find and end with an object that works better for its next life. Choose carefully, prepare patiently, and keep the design simple enough to finish well. With each project, you will develop a sharper eye for materials, repairs, colour, and the small details that make a refreshed piece feel like your own.
Frequently Asked Questions
What is a thrift flip project?
A thrift flip project is the process of changing a secondhand clothing, furniture, or décor item so it becomes more useful, attractive, or suited to your style. The change may be as simple as cleaning and repainting or as involved as altering the shape and purpose.
What is the easiest item to flip first?
A small, sturdy item with a simple surface is usually a good starting point. Plain frames, small timber pieces, baskets, and stable cotton garments allow you to practise preparation and finishing without managing too many repairs at once.
Can you flip thrifted clothes without sewing?
Yes. Cropping, tying, folding, patching, and some fabric adhesives can work for suitable garments and low-stress details. Always check the care instructions and test the method before applying it where it will be visible or heavily handled.
How do you know whether furniture is worth buying?
Check its stability, materials, proportions, and repair needs. A dated finish is often manageable, but serious structural damage, persistent odours, mould, or missing essential parts may make the project unsuitable.
Should you clean or sand before painting?
Usually, cleaning comes first because dust, grease, and residue can interfere with adhesion. The need for sanding depends on the surface and the product directions, so test a small hidden area and follow the label.
How can you keep a thrift flip affordable?
Set a total budget before buying, choose a design that uses supplies you already have, and track every additional cost. Simplifying the finish is often more effective than buying more decorative materials.
What should you include when selling an upcycled item?
Include accurate dimensions, materials, the changes you made, condition details, care instructions, and clear photographs. State what is included and describe any remaining marks so the buyer can make an informed choice.