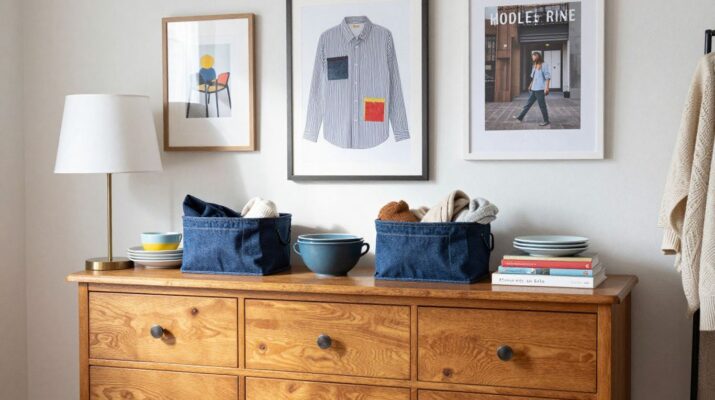
Key Takeaways
These thrift flip projects give overlooked clothing and furniture a useful second life, with room for your own style at every step.
- Start with clean, sturdy secondhand pieces that suit the project.
- Prepare surfaces and fabrics before making permanent changes.
- Use colour, hardware and texture to make simple flips feel intentional.
- Test adhesives, paint and finishes on inconspicuous areas first.
- Let practicality guide the design, especially for storage and everyday items.
1. Turn an old dresser into a bold statement piece
An old dresser can become the anchor of a bedroom, hallway or living area with surprisingly little structural work. Look for solid drawers, reasonably square corners and a frame that feels stable when you gently move it. Scratches and dated finishes are usually easier to solve than warped panels or extensive water damage.
Clean the entire piece with a suitable household cleaner, then remove the hardware and lightly sand glossy surfaces. You can paint the body in a deep green, warm terracotta or soft black, while leaving a timber top exposed if it is worth restoring. A restrained colour choice often makes the finished piece feel more considered than several competing effects.
Before reassembling it, check that every drawer opens smoothly and repair loose joints with the appropriate wood adhesive. New knobs can change the character completely, but measure the existing holes before buying replacements. Finish with a protective product suited to the paint or timber, and allow it to cure properly before putting the dresser back into daily use.
2. Transform thrifted frames into wall art
A group of secondhand frames does not need matching proportions to work together. In fact, slightly different shapes can make a wall arrangement feel collected rather than bought as a set. Choose frames with sound corners and surfaces you can clean without damaging delicate details.
Remove old prints, glass and backing, then decide whether the frames should share one finish or simply share a colour family. A single coat of paint can unify ornate timber, plain plastic and metal-look frames, while a few untouched pieces provide contrast. If the glazing is scratched, you can leave it out for a canvas-like effect or replace it with fresh glass cut to size.
Arrange the frames on the floor before hanging anything, leaving enough breathing room for each shape to be read clearly. You could display postcards, fabric scraps, pressed leaves or your own small sketches inside them. Use proper wall fixings for the surface and the weight, particularly when several frames are grouped above a desk or bed.
3. Repurpose vintage shirts into trendy tops
Vintage shirts often have excellent fabric and details hidden beneath an overly generous cut. Check the collar, button placket and underarm areas for stains or weakening before you decide how much alteration they can take. A shirt that is clean and structurally sound gives you far more freedom than one that only looks appealing from a distance.
You can shorten the hem, reshape the side seams or turn a long button-up into a cropped layer. Keep the original cuffs or pocket if they add character, and mark every change while wearing a similar top underneath. If you are sewing, baste the proposed shape first so you can test movement before trimming away fabric.
For a softer alteration, try a tie-front finish or a simple gathered detail rather than attempting a complicated pattern. Pressing each seam as you work makes the result look tidier, even when the garment remains visibly handmade. Wash the finished top according to the most delicate fabric involved, and avoid cutting until you are certain the measurements allow comfortable movement.
4. Make a no-sew tote bag from old clothing
A sturdy T-shirt, sweatshirt or lightweight pair of trousers can become a useful tote without a sewing machine. Choose fabric without brittle prints or extensive thinning, since the handles and base will carry most of the strain. Wash and dry the garment first so you are working with its settled shape.
Cut away the sleeves and collar, then trim the bottom edge into an even line. For a knotted version, cut a series of equal strips along the bottom and tie neighbouring strips firmly; for a cleaner edge, fabric adhesive or hem tape can create a simpler finish when used as directed. Keep the handles broad enough to sit comfortably on your shoulder.
Test the bag with lightweight items before relying on it for heavier shopping. You can add a contrasting pocket from another garment or use the original chest graphic as the front detail. The best result is not necessarily the most decorated one: a clean silhouette and secure base will make the tote more likely to become part of your regular routine.
5. Upcycle mismatched dishes into useful home decor
A jumble of plates, saucers and small bowls can become a practical display when you select pieces by shape and condition rather than by pattern alone. Avoid anything with deep cracks, sharp chips or unstable bases, especially if it will hold objects. Wash and dry every piece thoroughly before arranging the collection.
Different dishes suit different jobs, so it helps to map the intended use before choosing an adhesive or mounting method. This simple guide can keep the project attractive as well as functional.
| Secondhand find | Useful new role | Detail to consider |
|---|---|---|
| Small saucer | Jewellery or key tray | Choose a stable, level base |
| Shallow bowl | Entryway catch-all | Check that the rim is comfortable to handle |
| Large plate | Wall display | Use a suitable plate hanger or mounting system |
| Cup and saucer | Desk organiser | Keep the join secure and easy to clean |
Keep food-contact items separate from pieces decorated with paint, glue or non-food-safe finishes. A saucer can sit beneath a plant pot, while a large plate can hold mail near the front door. Once the use is clear, the mismatched patterns look like a deliberate collection rather than leftovers from different sets.
6. Give a thrifted lamp a modern makeover
A secondhand lamp is worth considering when the base is sound and the shape suits your room. Check the cord, plug, switch and socket for visible damage, and do not use a lamp that appears unsafe. Cosmetic changes are one thing; electrical repairs should be left to a suitably qualified professional.
Clean the base carefully, remove the shade and mask any areas that should not receive paint. A smooth, lightly keyed surface will usually accept a suitable metal, ceramic or timber finish more evenly than a dusty one. Matte black, creamy white and muted brass tones can all modernise a dated silhouette without hiding its interesting proportions.
The shade can be replaced, recovered or simply swapped for a simpler shape. Check that the shade sits securely and that the bulb has adequate clearance from fabric or other heat-sensitive materials. Put the lamp back in place only after the finish is fully dry, then use a bulb and fitting appropriate for the lamp and shade.
7. Convert old jeans into storage baskets
Denim has the firmness needed for small baskets, and worn jeans often provide several useful panels in one garment. Look for pairs with intact legs and minimal stretch, since very soft denim can slump unless it has support. Wash the jeans, remove the hardware you will not need, and press the fabric before cutting.
You can make a simple basket by cutting a leg section, closing one end and folding the top edge down to form a cuff. If you do not sew, a strong fabric adhesive may work for light-duty storage when applied and cured according to its instructions. Consider adding a lining from an old shirt if you want to soften the interior.
Plan the basket around what it will hold rather than making a shape first and finding a purpose later. These uses are particularly practical:
- Craft supplies that need to stay together.
- Remote controls and small electronics.
- Hair accessories or everyday toiletries.
- Rolled tea towels or reusable cloths.
Keep heavier items in a basket with a reinforced base, and avoid carrying it by a delicate cuff. A leather belt section can make a useful handle if it is firmly attached, while a contrasting pocket can provide a small outside compartment. The visible wear in the denim becomes part of the finish, so minor fading is an asset rather than a flaw.
8. Refresh secondhand furniture with paint and new hardware
Paint and hardware are two of the quickest ways to alter a secondhand table, cabinet or bedside unit. Begin by checking how the furniture is built, because a pretty surface will not solve loose joints, swollen boards or missing structural support. Photograph the original arrangement of doors and fittings before removing anything.
Degrease the surface, repair dents and sand only as much as the existing finish requires. Primer can help create an even base, particularly over dark colours or slick surfaces, while thin coats usually look cleaner than one heavy coat. Allow drying time between coats and protect the surrounding floor from drips and sanding dust.
Choose handles that suit the scale of the furniture and the way it will be used. Long pulls can make a cabinet feel more contemporary, while small knobs may preserve a delicate vintage character. Refit doors carefully, adjust hinges where needed and add felt pads or drawer runners so the finished piece feels good to use as well as pleasant to look at.
9. Create unique decor from vintage books
Old books can bring height, colour and texture to a shelf without needing much alteration. Select volumes with covers and spines you genuinely like, and avoid damaging rare or especially fragile books for a decorative experiment. Dust them gently and check for musty odours or moisture before bringing them into a living space.
A small stack can raise a vase or lamp, while a row arranged by colour creates a calm background for other objects. You can also turn a sturdy book into a hidden compartment, but that involves permanently cutting the pages, so practise on an ordinary discarded volume first. Keep the result dry and away from strong sunlight if you want the covers to last.
For a less permanent approach, wrap a plain book in removable paper or tie a narrow ribbon around a coordinated stack. A pressed botanical specimen or small ceramic object on top can provide the final detail without making the arrangement feel busy. The charm comes from combining readable texture with a useful display height, not from covering every surface.
10. Turn worn sweaters into cozy accessories
A sweater with thinning elbows or a tired hem may still have plenty of soft, usable fabric. Felted wool, dense knits and cotton blends can work well for smaller accessories, but inspect the garment for moth damage and wash it according to its care instructions first. Let it dry completely before cutting so you can judge its true size.
Sleeves are often ideal for warmers, bottle covers or small pouches, while the body can become a cushion cover or a pair of simple mitts. Use the existing ribbed cuff where possible because it gives an accessory a neat, flexible edge. If the knit unravels easily, reinforce the cut edge before adding any trim or fastening.
Texture does much of the decorating, so keep the shape uncomplicated. A wooden button, contrasting patch or strip of old denim can make the piece feel purposeful without hiding the sweater’s original character. Store finished accessories flat or folded, and keep them clean and dry so the reclaimed fibres remain pleasant to use.
Conclusion
The most satisfying thrift flip projects begin with a careful look at what a secondhand item can already do. Clean it, repair what matters, choose a finish that suits its new purpose and leave room for a little imperfection. A dresser, shirt, dish or sweater does not need to become unrecognisable to feel fresh; it simply needs a thoughtful next chapter.
Frequently Asked Questions
What is a thrift flip project?
A thrift flip project changes a secondhand item into something more useful, attractive or suited to your personal style. The change might involve cleaning, painting, altering, combining or giving the item a new purpose.
How do you choose a good item for a thrift flip?
Look for sound structure, useful materials and a shape you already like. Surface marks are usually manageable, but severe warping, cracking, mould or instability can make a project unnecessarily difficult.
What tools are useful for beginner thrift flips?
A basic starting kit might include cleaning cloths, screwdrivers, sandpaper, fabric scissors, a measuring tape, suitable adhesive and protective equipment. The exact tools depend on whether you are working with timber, metal, fabric, glass or ceramic.
Can you thrift flip clothes without sewing?
Yes. Some projects can use careful cutting, fabric adhesive, hem tape or knots instead of stitching. Choose stable fabric, keep the design simple and test the finished item gently before using it regularly.
How can you make painted furniture look neat?
Clean and prepare the surface first, repair dents, use suitable primer where needed and apply several thin coats rather than one heavy coat. Allow proper drying time, and protect the final surface with a compatible finish.
How do you make upcycled home decor practical?
Decide how the item will be used before decorating it. Check stability, cleanability, weight capacity and safe placement, particularly for lamps, wall-mounted objects, storage baskets and anything that may be handled often.
What should you avoid when upcycling secondhand items?
Avoid using damaged electrical items, cracked dishes or unstable furniture without professional assessment or proper repair. Also avoid permanent cuts or coatings until you have tested the design and confirmed that the material is suitable.