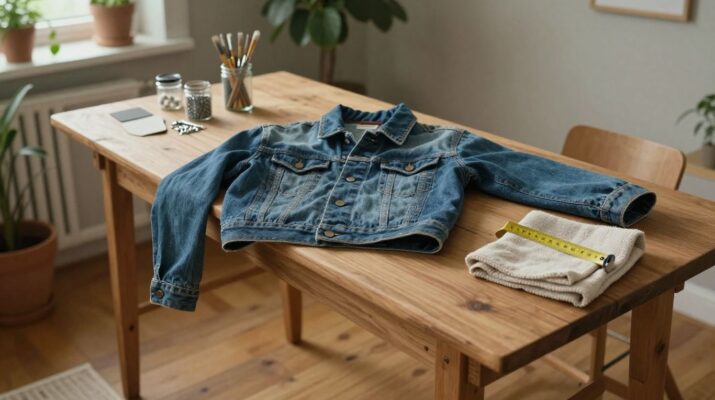
Key Takeaways
A successful thrift flip starts with a sound find and a plan that suits your space, skills, and patience. A few careful checks can save you from turning a small project into a long repair job.
- Choose well-made pieces with manageable wear and repair needs.
- Decide what the finished item should do before you begin.
- Prepare surfaces properly and use tools and protective gear suited to the work.
- Pick a transformation that matches your experience and the item’s material.
- Allow for repairs, drying time, and unexpected costs before calling the project finished.
Choose thrifted finds with flip potential
A good thrift flip begins before you bring anything home. Look past a dated colour or dusty finish and consider whether the item is well made, useful, and suited to a place you have in mind. A little wear can be part of the appeal; serious damage is a different story.
Look for sturdy materials and quality construction
Check the parts that take the most strain: chair joints, table legs, drawer runners, and the seams of a garment. Solid wood, sturdy metal, and tightly woven fabric can often stand up to a refresh, though the condition matters more than the label on the material. Give the piece a gentle wobble or press and listen for creaks. A sound structure saves effort because surface changes are much easier than rebuilding a weak frame.
Spot shapes that suit your space or style
Try to picture the item in your room or wardrobe as it is, then imagine what a modest change could do. A pleasing outline, useful proportions, or an interesting detail may be more valuable than a fashionable finish you can easily replace. Take a quick photo and compare it with the space where you plan to use it. If the shape already feels wrong, paint or new fabric probably will not make it feel right.
Check for stains, odors, damage, and missing parts
Inspect the item in good light, including the back, underside, seams, and inside drawers. Look for water marks, insect damage, loose joints, stuck hardware, persistent smells, and parts that are missing or mismatched. For upholstery, check beneath cushions and along seams; for clothing, look over fastenings and hems. Small issues may be manageable, but several problems together can change the project entirely.
Decide whether the item is worth the time and cost
Before buying, think through what the repair and makeover would actually involve. The table below can help separate a promising find from one that is likely to demand more work than you want to take on.
| What you find | A useful question | What it may mean |
|---|---|---|
| Loose joint | Can it be tightened or reglued? | A contained repair may be manageable |
| Deep stain | Can it be cleaned or covered? | The finish or fabric may need more work |
| Missing hardware | Can a suitable replacement be found? | Check fit and availability before committing |
| Strong lingering odour | Is the source clear and treatable? | Consider whether cleaning will be worth the effort |
Use those checks to make a realistic call, not to talk yourself into every bargain. If the repair is uncertain or the item needs several changes at once, leave it for someone with more time or experience. A thoughtful pass is often a better find than an ambitious project that stays unfinished.
Plan a project that fits your skills
A clear plan helps you make a piece you will actually use, rather than a project that keeps growing as you work. Decide what needs to change and what can stay as it is. Then match the work to your tools, available space, and comfort with hands-on repairs.
Start with a clear idea for the finished piece
Describe the finished item in a sentence: perhaps a sturdy side table with a lighter finish, or a jacket with a shorter hem. This gives you a useful boundary when you spot extra details to alter. Save a reference image if it helps, but keep the plan tied to the item you own. A small, deliberate change can look more considered than several competing ideas.
Match the flip to your experience level
If you are new to DIY, begin with a change that is easy to undo or correct, such as cleaning, replacing simple hardware, or making a straightforward hem. More involved work—like stripping a finish, altering a garment’s shape, or repairing a frame—can require practice and specialised tools. Choose one new skill at a time so you can tell what is working. There is no need to make a first project harder just to make it feel worthwhile.
Measure the item and its intended space
Measure height, width, and depth, then check doorways and walkways if the piece needs to move through them. For clothing, compare key garment measurements with something that fits you comfortably. A quick sketch can help you plan the scale of a trim or the placement of new hardware. These checks are less exciting than choosing a colour, but they prevent a finished piece from being awkward to use.
Set a realistic budget and timeline
List the materials and steps before you start, including cleaning, repairs, and finishing. A short project can still take several days if products need drying or curing time, so avoid planning around the quickest possible turnaround. Keep the scope modest and decide in advance which repairs are essential. That way, you can pause and reassess if the item asks for more than you expected.
Gather tools and prepare your find
Preparation is where a lot of the lasting work happens. A clean, stable surface makes it easier to see what needs repair and helps later finishes go on evenly. Set up the space before opening paint or taking anything apart.
Build a basic toolkit for common projects
You do not need a full workshop for every thrift flip. Choose tools based on the actual job, and gather them before you begin so you are not improvising halfway through. A basic kit might include:
- Tape measure and pencil for marking dimensions.
- Screwdrivers suited to the item’s fasteners.
- Cleaning cloths, mild cleaner, and a small brush.
- Sandpaper in an appropriate grade for the surface.
- Scissors, needle, and thread for simple clothing changes.
Keep the kit flexible: skip anything the project does not call for, and borrow or obtain a specialised tool only when you understand how it will be used. A few appropriate tools are more useful than a crowded box of unsuitable ones.
Clean and repair the item before making changes
Remove dust and dirt before sanding, painting, sewing, or fitting new hardware. Use a cleaning method suited to the material, and let the piece dry fully before moving on. Tighten loose screws and deal with straightforward repairs while you can still see how the item is assembled. Taking photos as you go can help you remember where small parts belong.
Sand, strip, or prime surfaces when needed
Not every surface needs to be stripped back. Light sanding may help a finish adhere, while a primer can be useful when the existing colour or material makes coverage difficult. Follow the directions for the specific products you use, and test an inconspicuous spot first. If you are unsure what an older coating is, avoid creating dust until you have worked out a safe way to proceed.
Use protective gear and work in a ventilated area
Read product labels before using cleaners, paint, adhesives, or sealants, and follow their safety directions. Choose protective gear appropriate to the task, such as gloves, eye protection, or a dust mask when needed. Work with good airflow, keep products away from children and pets, and store them securely between sessions. A tidy, well-ventilated setup makes the project more comfortable as well as more orderly.
Pick a transformation technique
The best technique depends on the item’s material, condition, and intended use. You might only need to refresh what is already there, or you may want to change the piece more substantially. Choose an approach that improves function as well as appearance.
Refresh furniture with paint or stain
Paint can give a tired piece a fresh colour, while stain can bring out the look of suitable wood. First check that the surface is clean and in a condition that can take the finish. Apply products according to their instructions, taking care not to cover moving parts or surfaces that need to fit closely. A restrained finish can leave the shape and construction as the focus.
Update clothing with simple sewing or no-sew methods
A hem adjustment, a replacement button, or a small change to the fit can make a garment more wearable without changing its character. Pin or mark the proposed change and try the garment on before cutting. Simple hand sewing works for many small fixes; fabric adhesive or hem tape may suit some projects when used as directed. Test your chosen method on a hidden area or spare fabric first, especially if the material is delicate or stretchy.
Change hardware, trim, or other small details
Small details can shift the feel of a piece without a full makeover. Check the size and spacing of existing holes before selecting replacement knobs or handles, and keep old hardware until you know the new parts fit. Trim can tidy an edge or add a subtle contrast, but it should not interfere with doors, drawers, or clothing movement. A few well-chosen changes are usually easier to live with than a pile of decorative extras.
Repurpose an item for a new use
Sometimes the most useful flip is a change of purpose. Before repurposing a container, basket, or small piece of furniture, consider what it will hold and whether its material is suitable for that use. Remove sharp edges, check stability, and avoid putting weight on a structure that was not built to carry it. Keep the original strengths of the object in mind; a new role should make those strengths useful.
Finish the piece for everyday use
A transformation is not complete just because it looks different. The finish needs to suit how often the item will be handled, moved, washed, or cleaned. Take time to check the practical details before bringing it into regular use.
Choose durable finishes for high-touch surfaces
A tabletop, drawer pull, or frequently handled garment faces more wear than a decorative surface. Choose a finish that suits the material and the item’s use, and follow the product directions for application and care. Avoid assuming one coating works for every surface. The right finish should protect the work without making the item difficult to maintain.
Let paint, glue, and sealant cure fully
Dry to the touch does not always mean ready for regular use. Check the product instructions for drying and curing times, and allow extra time if the room is cool or airflow is limited. Moving drawers or wearing a garment too soon can mark a finish or weaken a bond. Patience here can prevent a last-minute touch-up from turning into a larger repair.
Check that drawers, doors, and fasteners work
Open and close each moving part several times, and check that screws, hinges, and handles feel secure. Look for paint that has made a drawer stick or trim that catches when a door moves. For clothing, test buttons, zips, seams, and hems with gentle movement. Fixing a small snag now is easier than discovering it during everyday use.
Style the finished piece without hiding its best features
Put the piece where you intended to use it and give it room to do its job. Keep the surface clear enough to show the finish, grain, shape, or detail that made you choose it. In a room, try a few objects rather than filling every empty space; with clothing, build an outfit around the altered piece. The result should feel at home, not like a display that cannot be touched.
Avoid common thrift-flip setbacks
Even a simple project can hit a snag when the item has hidden wear or the plan depends on an untested finish. Slow down before making irreversible changes, and be willing to simplify if the work starts to expand. The aim is a useful piece, not a perfect makeover at any cost.
Don’t overlook hidden repair costs
A bargain can need replacement parts, extra cleaning, or repairs you did not spot at first glance. Check underneath cushions, inside drawers, and around joints before you commit. If an issue is difficult to assess, treat the uncertainty as part of the decision rather than assuming it will be easy to fix. That small pause can spare you from buying a project that does not suit your time or tools.
Test paint and finishes on a small area first
Colours and coatings can look different on the actual material than they do in a tin or on a sample card. Apply a small test patch in a discreet place and let it dry as directed before judging the result. Check the texture and adhesion as well as the colour. If it does not work, adjust the preparation or choose another approach before covering the whole piece.
Avoid taking on more work than your tools allow
A project can become frustrating when it requires cutting, drilling, or repairs you are not equipped to do safely. Before starting, identify any steps that need a tool or skill you do not have. You can simplify the design, ask someone experienced to handle a particular task, or choose a different find. Knowing where your limits are is part of making a good project plan.
Leave room in the budget for unexpected fixes
A missing screw or extra coat of finish can add materials and time. Set aside some flexibility when estimating what you will need, and avoid spending the whole project budget before the item is cleaned and inspected. If a surprise pushes the work beyond what you intended, reconsider the scope. A simpler finish can still make a piece feel fresh and ready to use.
Conclusion
The most satisfying thrift flip projects start with an item worth keeping and a plan that respects its condition, your skills, and the way you will use it. Take time to inspect, prepare, and finish the piece properly, and let a few thoughtful changes do the work. A sturdy find with a simple, useful new life is a success in its own right.
Frequently Asked Questions
What is a thrift flip?
A thrift flip is a project that updates, repairs, or repurposes a secondhand item so it better suits your needs or style. It can be as simple as cleaning and changing hardware or as involved as altering a garment.
What should you look for when choosing an item to flip?
Look for sound construction, a shape you like, and damage that seems manageable. Check less visible areas too, including joints, seams, drawer interiors, and the underside.
What is an easy thrift flip for a beginner?
A straightforward refresh, such as cleaning an item, replacing compatible hardware, or making a simple hem, can be a good place to start. Choose a task that uses tools and skills you already have.
Do you need special tools for thrift flip projects?
Not always. A tape measure, suitable screwdrivers, basic cleaning supplies, and simple sewing tools cover many small projects, but the right toolkit depends on the item and technique.
How do you know whether furniture is worth flipping?
Check whether the frame and joints are stable, whether the main surfaces can be cleaned or repaired, and whether missing parts can be replaced. Consider the time and materials needed before deciding.
How long should you wait before using a finished piece?
Follow the directions for the paint, glue, sealant, or other products you used. Some finishes need time to cure beyond the point when they feel dry, so avoid rushing the final step.
Can you flip clothing without sewing?
Some simple changes can use fabric adhesive or hem tape instead of stitching, depending on the fabric and the garment’s intended use. Test the method first and follow product directions.